Thursday, September 22, 2022

Can't get enough Noof

 Hi Everyone,

Cornelia here today. This week it's anything goes on the Topflight blog. I told you that I couldn't get enough of Noof (the name of the cat), so here he is again! I made a similar card last month. You can see it HERE,
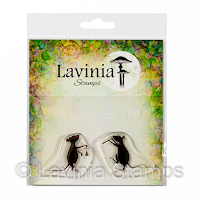
I stamped the cat and sponged it with distress oxide ink (wild honey). I made a mask for the bottom of the cat and sponged with distress ink (forest moss). Added the mice and added the heat embossed sentiment. 

I hope you liked this. Thanks for visiting. 
See you next week with more Topflight Stamps inspiration.


Wednesday, September 21, 2022

Animal funnies - KatzelKraft


Good morning!! Here is your mid-weekly dose of funny! I'm using the new Darkroom Door stencils to focus all the attention on these Katzelkraft farm animals. The sentiments are from AALL&Create stamps. 

The first card is pretty straightforward. Stamp the duck and color with Copics. Use the outside portion of the stencil and color in orbs or bubbles all around the duck. Finish with the sentiment. 


This little piggy definitely likes going to the market. Stamp the pig and make a mask as well. Use the outer portion of the stencil and color the middle. Undo the mask and color the mask. Finish with a sentiment. 


Darkroom Door - Small Stencil - Square Set

I started the last card with placing the outer portion over the cardstock and then stamping the donkey. Place the middle portion of the stencil over the donkey and color the frame. Finish with a sentiment.


I hope you liked today's cards!!! Drop me a hello!!

Charmaine

Tuesday, September 20, 2022

The Most Wonderful Time of the Year -- Halloween!

Greetings! It's Tuesday so you've got Kathi here to share a project with you. I've created a Halloween card with the  Poe's Ravens Rubber Cling Stamp Set by Marty Crouz for Carabelle Studio and sentiments from the Miss Merry Clear Stamp Set 608 by Janet Klein for AALL and Create and the Classic Sentiments Clear Stamp Set by Heffy Doodle. The background was created with the Distressed Brick 6x6 Stencil  by Paper Rose.

Here it is!


A stamping platform was used to both position and stamp the ravens and the candle holder from  Poe's Ravens Rubber Cling Stamp Set by Marty Crouz for Carabelle Studio onto white cardstock and onto label paper that was fussy-cut to mask the images.

The bottom portion of the image panel was covered with a ruler and grey ink was brushed over the masked images to create a grey background.

Grey and a touch of reddish ink was brushed over the Distressed Brick 6x6 Stencil  by Paper Rose to create a brick wall behind the ravens.

The stencil was removed, the ruler was repositioned, and tan ink was brushed below the wall to create a wooden table top for the ravens.

All the masks were removed and the images and the wood table were colored with Copic markers.

Two speech bubbles were die-cut, then Onyx Black VersaFine Ink by Tsukineko was used to stamp the sentiments from the Miss Merry Clear Stamp Set 608 by Janet Klein for AALL and Create

The image panel was trimmed to 4.75" square and adhered to a white 5" square card. The sentiment die-cuts were adhered to finish the card.

Please pop over to my blog, Kat's Tales of Stamping, for step-by-step instructions and complete supply lists.

Topflight Stamps Products Used:


Thanks for visiting today!

Monday, September 19, 2022

Nuts About You - 2 autumn cards

 Please tell me I'm not the only one with a secret squirrel obsession...?! I think they're the cutest things and could definitely watch them all day long. My name is Rachel rwkrafts.com and I have a squirrel addiction :) When I saw the Nuts About You stamp from Heffy Doodle, I knew I had to have it.


I stamped every image, most of them twice, and spent the afternoon coloring. I used my Brother Scan n Cut to cut the images, and all are colored with Copic markers.


And my finished coloring pieces...


Since I had so many images ready to go, I decided to create two cards.


And one with the cute birdies...


Thanks for stopping in!

Topflight Stamps supplies used:


Sunday, September 18, 2022

Lavinia Stamps Night Owl Scenes


Hi friends!  It's Autumn Clark from SewPaperPaint back with you today to share a couple of owl themed cards featuring Lavinia Stamps & Stencils.  For my first card I dipped my panel in a light wash of Confetti Elements Dye Ink, then layered the Lavinia Abstract stencil over my panel and sprayed Tangerine Dream Glimmer Mist.  It left a beautiful orange shimmer!  I blotted some of the ink and the pattern wasn't as visible as I had hoped, so I tried a second round of spraying.  This time, I sprayed Bronze Penny just over select portions of the Abstract stencil.  Now, Bronze Penny in my experience is a brown spray with added shimmer.  You can see how it looks almost like walnut stain.  It's beautiful, but heavier on the color than I would have thought looking at the label.  This is why some (smarter than myself) people make color swatches.  I just fly by the seat of my pants and bin the project if it goes south.  Ha ha ha, but in this case I was pleasantly surprised and so I persisted...

I stamped the Tree of Courage branches (turning the stamp upside down for the left side) and then the owls, Echo and Drew, then decided to add a moon.  I'm not entirely sure I recommend this method, so if you try it do so on a scrap first.  But I circled my white Posca paint marker and then smeared it with my finger quickly in a circle.  I repeated this several times until my moon was large enough and white enough for my card.  There is a half minute or so drying time, so that's how I managed this.  Later, I blended a little Sundance over the bottom of the moon and some Stickles over the top to liven it up a little.  Along the bottom of my card, I stamped the Fern Heads in Truffle and accented them with a gold gelli roll pen and more Stickles.  I stamped the Snow Shrub in Russet Orange and finished with some white Posca marker highlights.  I do like adding the white dots on my work, but decided this panel needed some dark spots, so I used the Mini Dots stamp to stamp randomly around the sky in Truffle.  What a great little stamp!


Once you get going with these critters, it's hard to stop envisioning new scenes...  This time I made a mask for my moon.  I simply traced the bottom of a pill bottle onto a sticky note and cut it out.  You could use a die cut for this, but I was stamping away from home and had to make do.  With my mask in place, I lightly sponged Mermaid Elements Dye Ink with my blending brush in a circular motion around it.  Around that I sponged Mulberry, especially making the corners dark.  I lifted my mask and very lightly sponged the moon with more Mermaid so it wasn't just bright white.  I used a torn sheet of paper to mask and sponge the hills along the bottom of the panel, then stamped the Seasonal Tree and the little owl along one of the hills.  And there you have two very different designs with one little owl stamp set.  I really hope these cards and techniques have inspired you today!  Hugs, Autumn

Because these inks are water reactive, I was able to use my water brush to lift up color to form the clouds.  I just brushed and blotted, brushed and blotted until the color was as desired.  The white highlights and Stickles add to the effect.  For my ground cover, I stamped the Silhouette Foliage and Flora Set repeatedly in the coordinating ink pads. 

For my final card I stamped the sweet owls onto a background stenciled with the Abstract stencil over the same Tree of Courage stamp.  The bottom was stamped with the Fairy Buttercups stamp.  The colors of Elements ink are Mulberry and Confetti.  This one was super simple to make and is a good warm up card for a Lavinia play day!  I hope you're inspired and will enjoy your stamping time, Autumn

Find Lavinia Stamps & Stencils at Topflight Stamps today!


01 09 10