Showing posts with label glimmer mist. Show all posts

Sunday, September 18, 2022

Lavinia Stamps Night Owl Scenes


Hi friends!  It's Autumn Clark from SewPaperPaint back with you today to share a couple of owl themed cards featuring Lavinia Stamps & Stencils.  For my first card I dipped my panel in a light wash of Confetti Elements Dye Ink, then layered the Lavinia Abstract stencil over my panel and sprayed Tangerine Dream Glimmer Mist.  It left a beautiful orange shimmer!  I blotted some of the ink and the pattern wasn't as visible as I had hoped, so I tried a second round of spraying.  This time, I sprayed Bronze Penny just over select portions of the Abstract stencil.  Now, Bronze Penny in my experience is a brown spray with added shimmer.  You can see how it looks almost like walnut stain.  It's beautiful, but heavier on the color than I would have thought looking at the label.  This is why some (smarter than myself) people make color swatches.  I just fly by the seat of my pants and bin the project if it goes south.  Ha ha ha, but in this case I was pleasantly surprised and so I persisted...

I stamped the Tree of Courage branches (turning the stamp upside down for the left side) and then the owls, Echo and Drew, then decided to add a moon.  I'm not entirely sure I recommend this method, so if you try it do so on a scrap first.  But I circled my white Posca paint marker and then smeared it with my finger quickly in a circle.  I repeated this several times until my moon was large enough and white enough for my card.  There is a half minute or so drying time, so that's how I managed this.  Later, I blended a little Sundance over the bottom of the moon and some Stickles over the top to liven it up a little.  Along the bottom of my card, I stamped the Fern Heads in Truffle and accented them with a gold gelli roll pen and more Stickles.  I stamped the Snow Shrub in Russet Orange and finished with some white Posca marker highlights.  I do like adding the white dots on my work, but decided this panel needed some dark spots, so I used the Mini Dots stamp to stamp randomly around the sky in Truffle.  What a great little stamp!


Once you get going with these critters, it's hard to stop envisioning new scenes...  This time I made a mask for my moon.  I simply traced the bottom of a pill bottle onto a sticky note and cut it out.  You could use a die cut for this, but I was stamping away from home and had to make do.  With my mask in place, I lightly sponged Mermaid Elements Dye Ink with my blending brush in a circular motion around it.  Around that I sponged Mulberry, especially making the corners dark.  I lifted my mask and very lightly sponged the moon with more Mermaid so it wasn't just bright white.  I used a torn sheet of paper to mask and sponge the hills along the bottom of the panel, then stamped the Seasonal Tree and the little owl along one of the hills.  And there you have two very different designs with one little owl stamp set.  I really hope these cards and techniques have inspired you today!  Hugs, Autumn

Because these inks are water reactive, I was able to use my water brush to lift up color to form the clouds.  I just brushed and blotted, brushed and blotted until the color was as desired.  The white highlights and Stickles add to the effect.  For my ground cover, I stamped the Silhouette Foliage and Flora Set repeatedly in the coordinating ink pads. 

For my final card I stamped the sweet owls onto a background stenciled with the Abstract stencil over the same Tree of Courage stamp.  The bottom was stamped with the Fairy Buttercups stamp.  The colors of Elements ink are Mulberry and Confetti.  This one was super simple to make and is a good warm up card for a Lavinia play day!  I hope you're inspired and will enjoy your stamping time, Autumn

Find Lavinia Stamps & Stencils at Topflight Stamps today!


Monday, May 30, 2022

Find a Reason to Smile with AALL&Create

 Hello everyone, I hope you're having a creative 3-day weekend! This is Rachel from rwkrafts.com and I'm sharing a colorful mixed media card that's perfect for any occasion.


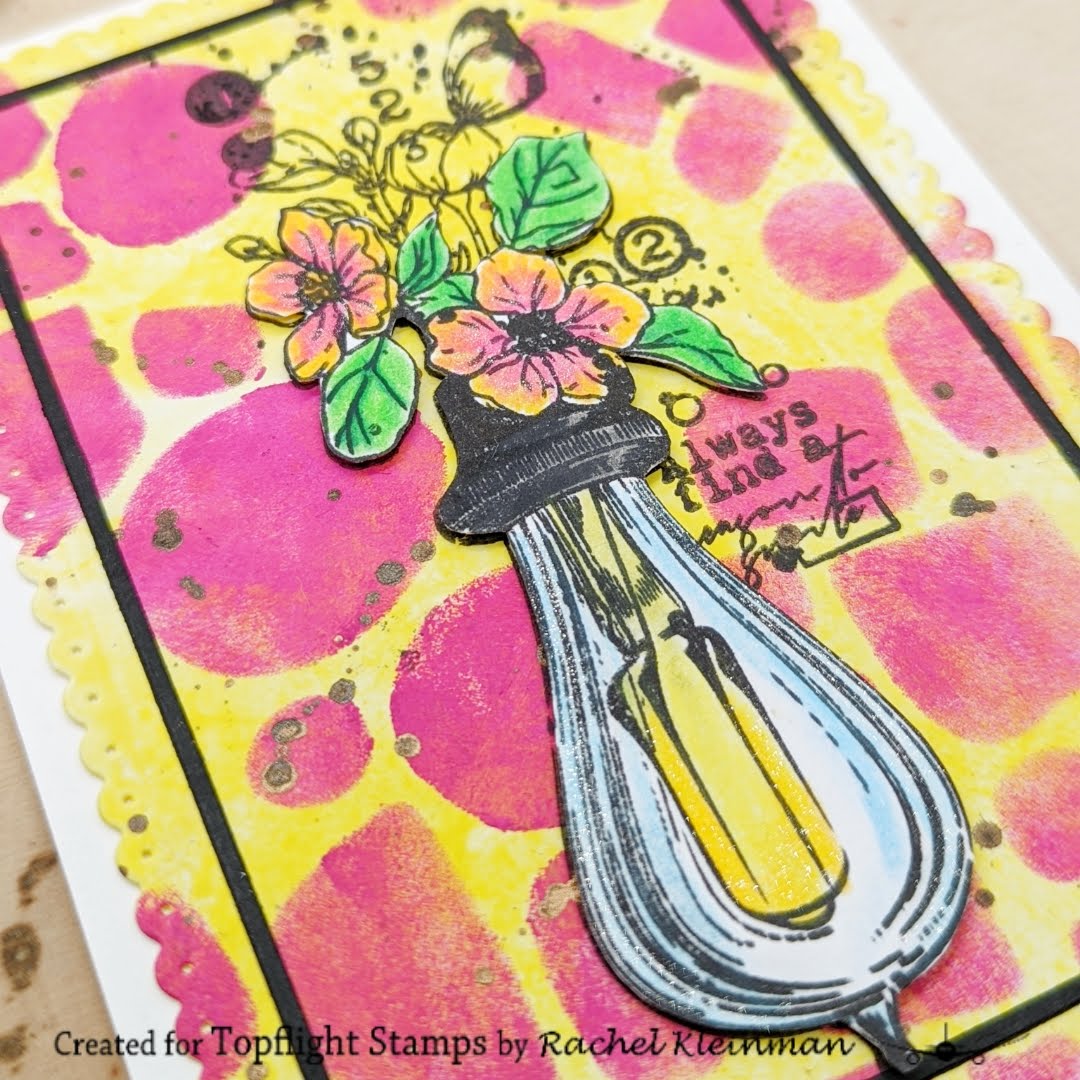
I've gotten a lot of use out of the AALL & Create "Filaments and Feathers" stamp set! This time I used the beautiful lightbulb stamp for this card. Here's how I created it:


First I put some Zesty Zing paint on my craft mat and sprayed it with water. I then sprayed my mixed media paper with water and dipped it on the pool of paint...


Once the paint dried, I added the stencil Paper Artsy PS310 using Bougainvillea paint.


I then stamped the lightbulb onto the panel and also splattered some Glimmer Mist in Bronze Penny.


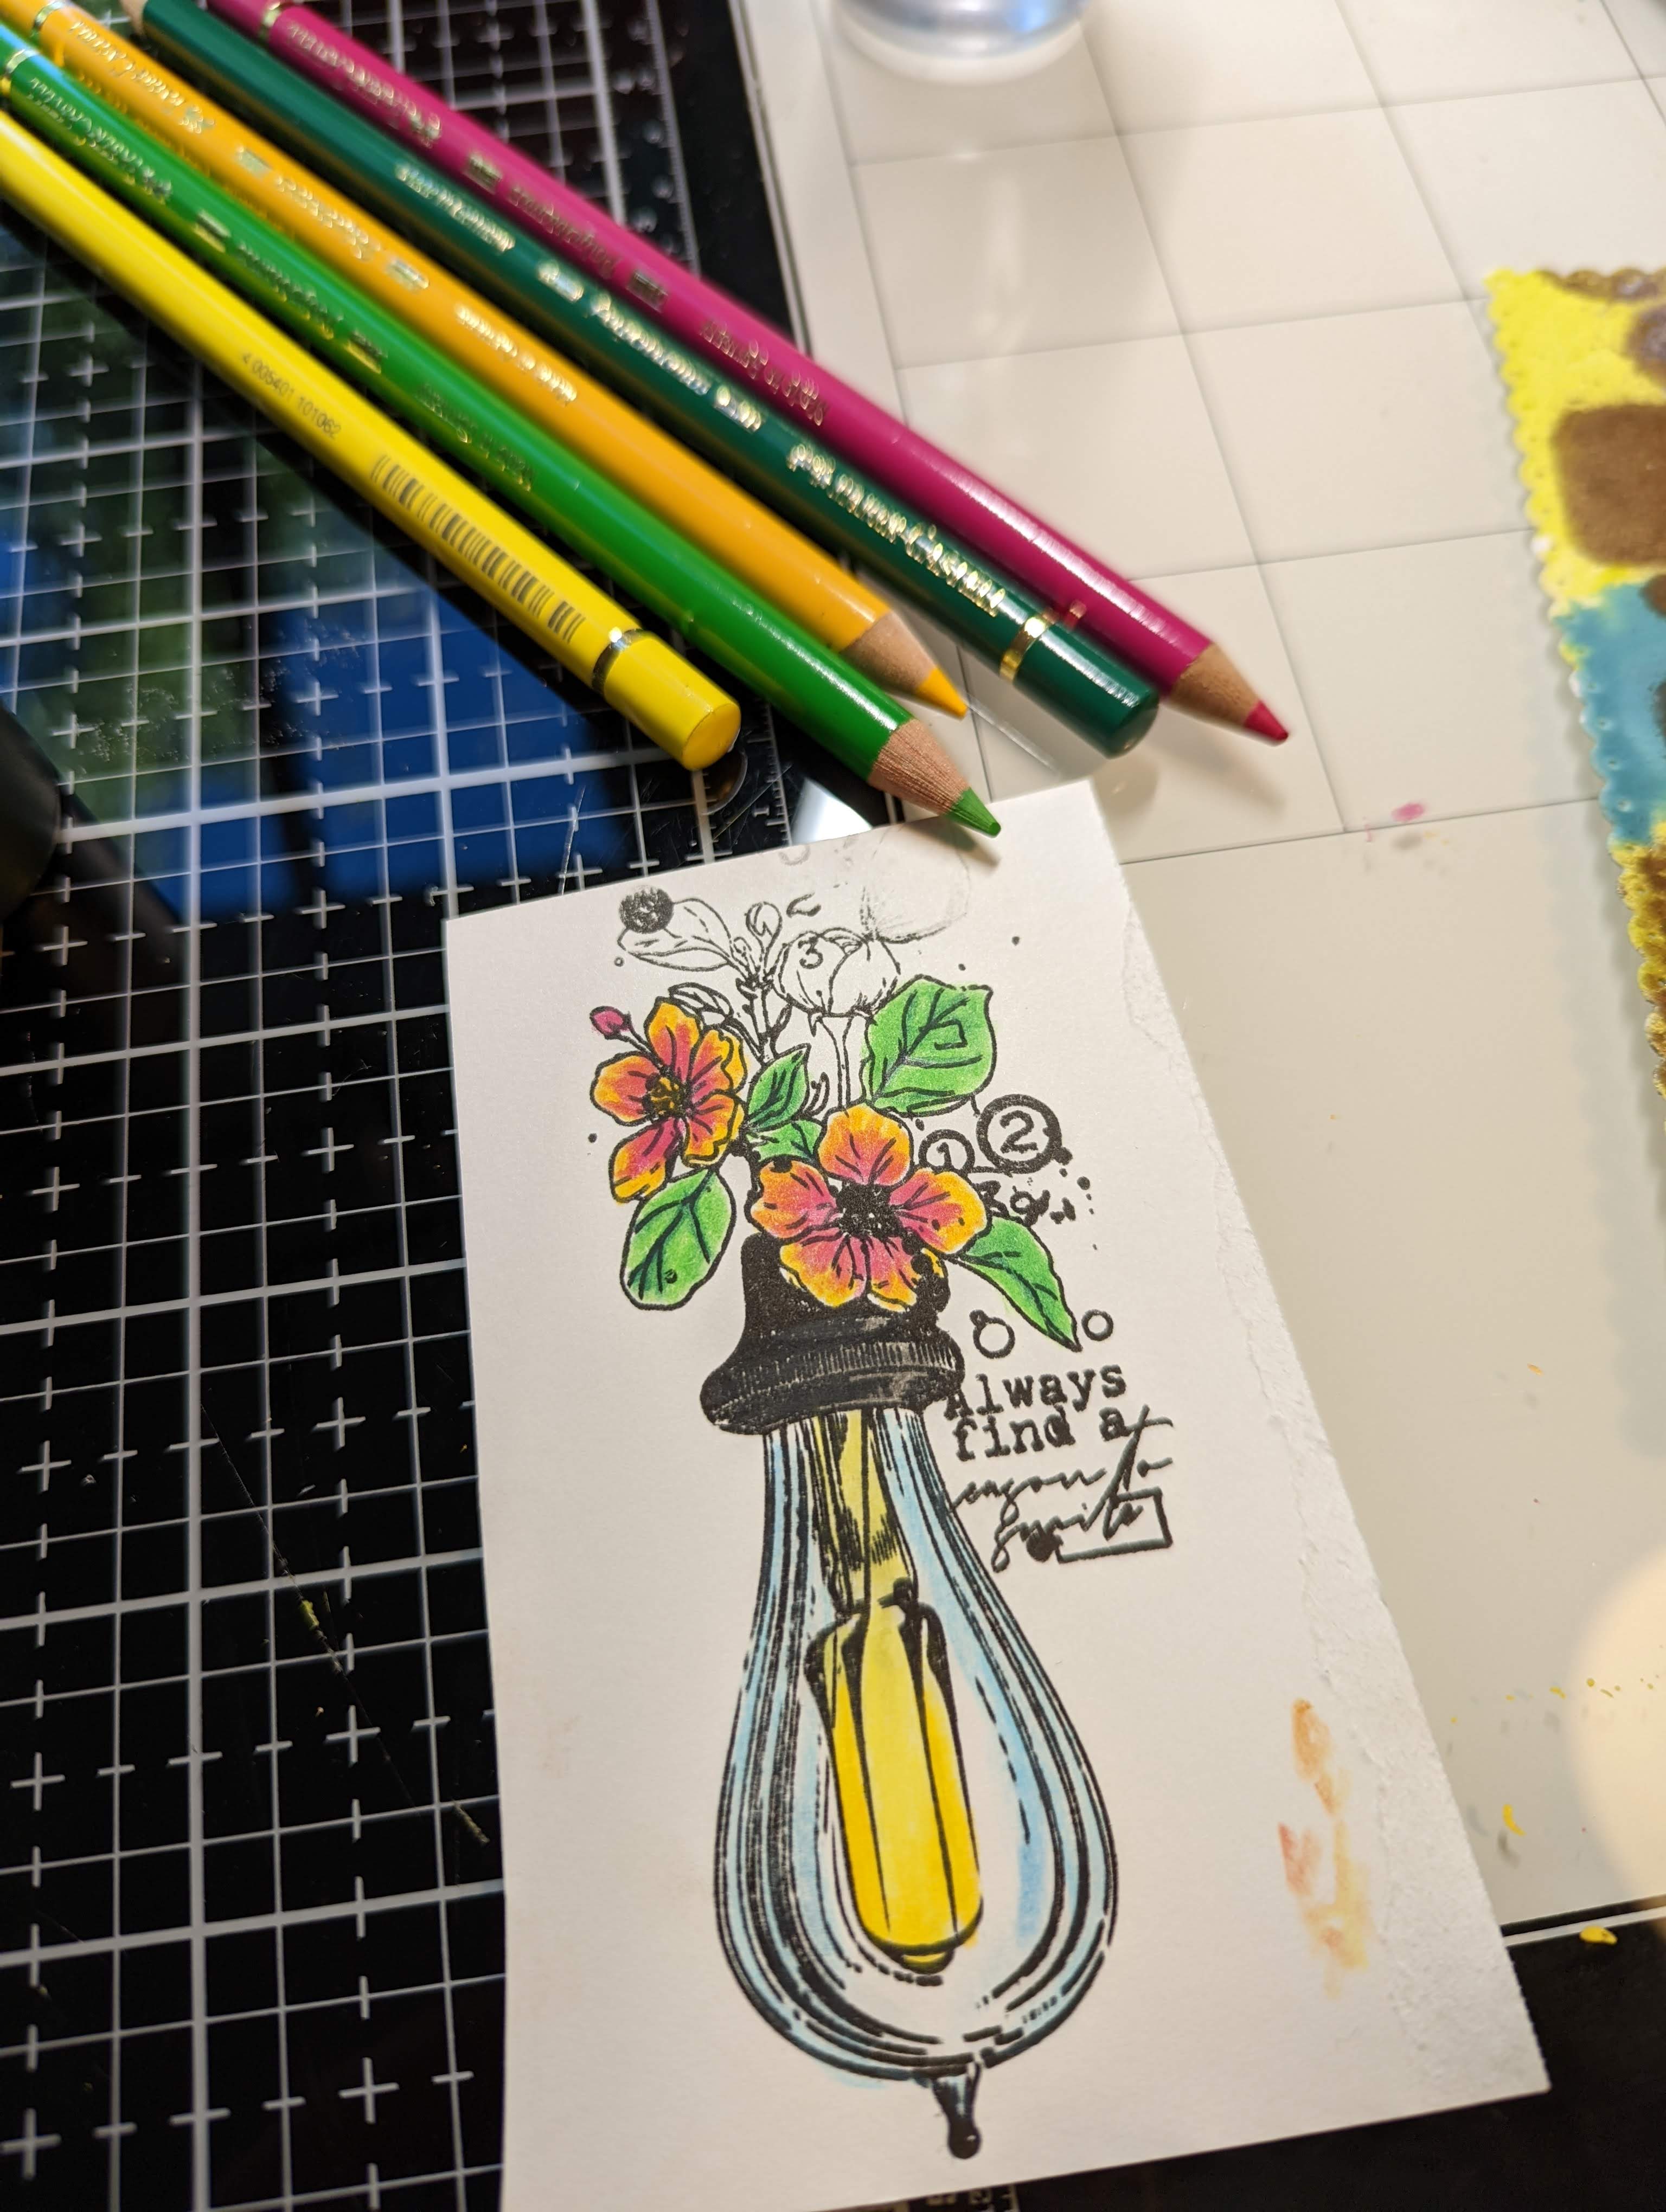
I stamped the lightbulb a second time on white cardstock and colored with Polychromos pencils. I fussy cut the main portion of the image and added it to the panel with foam adhesive.


The panel is complete and ready for a card base! This card came together really quickly and will be easy to recreate. Thanks for joining!


Topflight Stamps Products Used:


Wednesday, March 30, 2022

AALL & Create: Enjoy your special Day by Charmaine Canham

Good Morning!! 

I like to put my go-to Copic Markers away and pull out my Prismacolor pencils once in a while to create a very different look than alcohol markers. You still build color upon color, but it becomes magical when the colors create a new shade of blue, like today's flower. 


Here is my card using a stamp from AALL & Create (Textured Florals) from Topflight Stamps.


I used Prismacolor pencils and a simple masking technique to create the detail in the background. Use shades of blue, lightest first, and layer color upon color. Use a fade-out type of ink pad to create soft lines. 
Start with the lightest shade of blue and introduce darker colors as you go.


Add pink to the center.


Two shades of green for the stem with a white highlight.


Make short markings with the brown for the iris of the flower. Use a black Micron pen for more detail.


Next, stamp another flower on masking paper and cover
your colored flower. Use distress oxide for the background.


Add a stencil detail over the background. 


Stamp the included stamps in the set with distress
oxide for a softer look.


Add some shimmer with Prism Glimmer spray.


Pull the mask and add your sentiment
on dimensional foam tape. Add more shadows and highlights
 with a gel or paint pen.


I would love to hear your comments on this card!
Charmaine

Follow me on Instagram and Facebook for almost daily inspiration.


Saturday, January 22, 2022

AALL & Create Tracy Evans Penguin Mixed Media Tag & Card


Happy winter friends!  It's Autumn Clark from SewPaperPaint with you today to share some fun mixed media projects featuring the fun new penguin stamp set by Tracy Evans for AALL & Create (#604).  I couldn't wait to have a play with these stamps!  I ended up making a tag/card combo because I just couldn't stop with one project. 

I used texture paste through the Mosaic stencil (#54) onto watercolor paper and while the paste was wet sprinkled the top with Sleight Blue Infusions powder by PaperArtsy.  I sprayed and sprayed with water to let the color run through the texture pattern and then let it dry completely.  In the end I liked the darker portion at the bottom, so I cut up the 6x6 panel and mounted it onto a tag, making a mini tag from the cast off, on which I stamped the tiny text in the set, so cute! 

I used a very old Sizzix die to cut the snowflake from thin chipboard, then covered the entire piece with more texture paste for a snowy effect.  I added some silk ribbon and a mounted sentiment sticker to finish it off. 

Next, I played around with the paper I used to mop up the inks from the Infusions drips.  

I used the Brrr stamp to add subtle contrast in the background (Iced Spruce DOX) then used the extra paper to tear snowy hills.  I scraped texture paste on the tops and sprinkled with holographic embossing powder and heat set to add some shimmer.  I gave everything a splash of Bronze Glimmer Mist and added another sentiment.  This time I added a little watercolor detail to the penguins for a color pop.  I'd like thank my teammate Kathi for sharing this fabulous textured paper with me, which made the perfect mat for this colorway.  :)

I hope these projects have inspired you on this winter's day!  xx, Autumn

Grab your Mixed Media supplies at Topflight Stamps today!


01 09 10