Showing posts with label fresco finish. Show all posts

Tuesday, October 17, 2023

Something Wicked

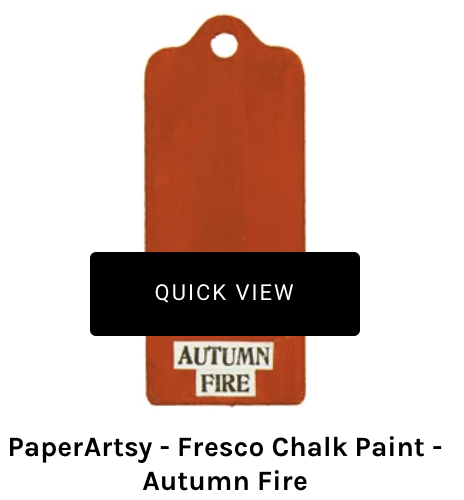
It's Tuesday, so you've got Kathi here to share a project with you. This week my teammates and I are making mixed media projects.  I've created my Halloween card with a 5" x 7" Gel Press, a 2" Speedball BrayeHaystackYellow Submarine, and Autumn Fire Fresco Finish Chalk Acrylic Paints by PaperArtsyNocturne VersaFine Clair Ink by Imagine Crafts/Tsukineko, the Time Flies Stencil by Visible Image, and sentiments from the Raven Clear Stamp Set #49 by Olga Heldwein for AALL and Create.

Here it is!


I started the project by adding drops of Haystack Chalk Acrylic Paint by PaperArtsy to my 5" x 7" Gel Press, then spread thee paint to a thin layer with the 2" Speedball Brayer. A piece of patterned cardstock was placed facedown onto the gel press, the back was smoothed, and the print was pulled. This process was repeated with Yellow Submarine, and Autumn Fire Fresco Finish Chalk Acrylic Paints until I was mostly happy with the blending and coverage. 

I'm a Virgo, so I heat set the print, though it was mostly dry as Fresco Finish Chalk Acrylic Paints air dry super quickly. 

I taped the Time Flies Stencil by Visible Image to the print using low-tack tape. taking care to cover the "Time Flies" words and the small ravens with the tape. Nocturne VersaFine Clair Ink by Imagine Crafts/Tsukineko was sponged over the stencil onto the print. The panel was then heat set.

Nocturne VersaFine Clair Ink by Imagine Crafts/Tsukineko was used to stamp three of the sentiments from the Raven Clear Stamp Set #49 by Olga Heldwein for AALL and Create. Thes sentiments were heat set. I used my pouncy tool to add Nocturne VersaFine Clair Ink speckles to the image panel to add some grunge.

The image panel was slightly trimmed, then the edges were distressed with the edge of a pair of scissors. 

The image panel was mounted onto a 6.75" x 4.75" panel of black cardstock, then adhered to a 7" x 5" orange card.

Please pop over to my blog, Kat's Tales of Stamping, for step-by-step instructions and complete supply lists. 

Topflight Stamps Products Used:


Thanks for visiting!

Tuesday, July 6, 2021

Seashells at the Seashore

 Greetings! It's Tuesday so you've got Kathi here to share a project with you. This week I've created a mixed media card using Darkroom Door's Seashells Red Rubber Cling Stamp SetSeaside Red Rubber Cling Word Block, and  Seashells Film Strip Red Rubber Cling Stamp. The background was created with Sea GlassCaramelVintage LaceVanilla, and Buff Fresco Finish Chalk Acrylic Paints by PaperArtsy.

Here it is!

The first thing I did was to apply a few dots of each of the above Fresco Finish Chalk Acrylic Paints to a piece of Inkssentials Foam as shown below. 


The paint bedotted foam was squished onto a craft mat to blend the colors, then applied to mixed media cardstock. This was repeated until two pieces of paper were covered. Both sheets were heat set.


A stamp platform was used to position the Seaside Word Block Red Rubber Cling Stamp. The stamp was inked with Arctic Mist Prism Ink by Hunkydory Crafts and stamped onto one of the sheets. The stamp and the background panel were kept in position. The stamp was cleaned, inked with Speckled Egg Distress Ink, and the background was stamped. The stamp was cleaned, then inked sparingly with Desert Sand Memento ink, then the background was stamped again. The background panel was heat set.

The same process described above was used to stamp the four shells and the starfish from the Seashells Red Rubber Cling Stamp Set. They were fussy-cut and colored with Copic markers.

Jet Black Archival Ink was used to stamp the Seashells Film Strip Red Rubber Cling Stamp onto white cardstock. The image was trimmed then brushed with multiple colors of Distress ink.

The border and word background panel were adhered to a black cardstock panel and the colored seashells were adhered. Blue cardstock, cut to 4.75" x 6.75" was edged with black ink, then adhered to a blue 5" x 7" card. The image panel was adhered to finish the card.

For more information about this card, please visit my blog, Kat's Tales of Stamping

 Topflight Stamps Products used:


Thanks for visiting today!

Monday, July 5, 2021

Art Card with PaperArtsy & Seth Apter

 Hello Topflight Stamp lovers, Karen Bearse here with a new post playing with Seth Apter's newest release with PaperArtsy. Seth has 3 new stamp sets as well as 4 Fresco Finish paints. Hop on over to my blog to check out tutorials for both the pocket & a link to the tag play. There are also videos for each project if you would like to play along!

This week I continued to explore the concept of Art Card/ Pocket. This time I made my pocket that will  co-ordinate with a previous tag. They now have a home in my most recent junk journal. Don't they look so happy together? 


 Let's check out the products that were used to create these little works of heart. Seth's newest stamp set ESA24 has some wonderful images as always in etched red rubber. Just love how his sets can be used as one & done, background, focal images & words that can be used as titles. This may be my new favorite. 


 I also had to add the circle stamp, it is just one of my go to sets! ESA13 has some great images & funky cool words too. 


Fresco Finish is a grab for anything type of paints, the matte finish is great for mixed media as it dries quickly & you can write on it with almost any type of pen without wrecking them! Also with so many colors to choose from, you can always add a few to your order. 

 
The paints were applied directly to paper using a brayer. This creates a really cool layered background look. 


 Of course nothing says art journal like stencils. I chose a few and one of my new favorites. PS090


This one has quite a few cool images & I am a sucker for circles. PS249


 Of course every mixed media piece needs embossing powder in my opinion!  Since this was a Seth page his Cosmic Trio emboss by Wow was added to some of the the stamp images. Just pull out their embossing pad. For a full supply list & tutorial hit up my blog. Thanks for joining me today, I hope you pull out some of your supplies this week & get inky!! 

Monday, February 15, 2021

Art Journal Page with PaperArtsy

Hello Fans of Topflight Stamps, Karen Bearse here today with an Art Journal Page that is jammed full of PaperArtsy. I started arting & could not stop but the beauty is it was so good for my soul! Layer upon layer of nummy mixed media. As always I have a tutorial on my blog which you can find here. There are about a zillion step out photos!


Let's see some of the product I used to create this, a full list with the process & links is on my blog.


Let's start with a stencil. This is such a cool postage mark stencil by Sara Naumann PS204

Then add some texture with Lava Paste. 


 Of course we need ink, how about Infusions?   


Maybe some paint? My favorite is Fresco Finish.  


Every Art Journal Page needs stamps & I used a lot of Seth Apter on this page.  These are sold as mini singles, love them!! EM54 EM52  & EM45.


I also used parts of the sets- Magic Set, Journey Set.


I can't seem to stop using Embossing Powder.  


 Finished it off with this  stamp one of the fun ones!!! EM37 

Thanks so much for joining me!! Let me know what you think. I hope you have time to get inky!!  

Monday, February 1, 2021

Art Journal Page with Art By Marlene

Hello Fans of Topflight Stamps, Karen Bearse here today with a fun, colorful art journal page. This is the perfect page to add color to a dreary winter's day. 

As always a full tutorial is available on my blog with lots of nummy step out photos.  Let's look at the products that were used to make this page happen. 

I started with an Art By Marlene Art Journal book. It is a vinyl, 3 ring binder cover filled with lovely mixed media paper. Love the color art of this book. Simply remove a page to work on it, then pop it back in the journal when done. 

Fresco Finish Paint was used to create the background, the matte finish of this paint makes it quick drying & easy to work with. 


 Love the look of this Number Jumble stencil, you could also use it to create date headings for your journal page. Experiment by using different stencils together.

My new favorite Sketched Alphabet stamp, the sketchy look of this set. It stamps like a dream.

The images from Art By Marlene's Paper Element packs are just so colorful & detailed. Simply pop out the image from the paper pad & adhere to your project. 

The quotes on my tags are from this pad of wonderful, witty Sticky Quotes. Each quote comes in black or white. 

Thanks so much for joining me here today. I hope that in these turbulent times you make the time for some mental health art play & get inky!

Monday, December 21, 2020

Happy Jolly Days Mitten

 Hello Topflight Stamp Fans, Karen Bearse here with my last post of the year!!! Wow & what a year it has been. I hope you get some time to craft away the crazy & ink your way into the New Year. I hope your family is safe & healthy & that 2021 is the best year yet. 


As always there is a tutorial on my blog as well as 2 other examples using the same technique. Let's see what products were used. The base was created using Eileen Hull's Mitten Box die cut.


This is one of my all time favorite Christmas sets. So funky. ZA18

 
This set was used for the embossing on the bottom of the mitten. I can see some soft shabby chic cards with this one. ESN40
 
 While we are talking embossing, Eileen Hull's Polished Silver was used on the back ground, Golden Rod on the trim & Glistening Glass to give the quote that epoxy look.  Love this chunky emboss!
 
 
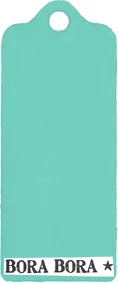
The background is Fresco Finish paint which is great to emboss on by the way. I used Bora Bora & South Pacific but with so many colors to choose from you can create almost any combination. 
 
 
Here is my trio of mitten's they can be used as tags, ornaments on cards or strung together as a banner. So many choices. Use as an element in your mini albums too!  The links to all these previous projects is on my blog too. I hope you have a very Merry Christmas & a Happy Holiday. I pray that whatever holiday you practice it is wonderful & that you have a chance to get inky!

01 09 10