Friday, February 9, 2024

AALL & Create Gel Press Tag


Hello friends! Ericka from Strangely Creative here and today I have a fun tag I made using my gel press along with the AALL & Create Rainbow Lane stencil along with the Die Set Hexalove

I first applied the PaperArtsy Fresco Chalk Paint in Sunshine to my gel press and pulled the print. I then applied  the Fresco Paint in Flamingo, Bermuda, and Parakeet and placed the stencil down and pulled the print.


I added a little shading with the Lavinia Elements Ink in Dark Denim with the Stencil Brush. I used the Die Set Hexalove with black card stock and also used a label and heart included in the set. I finished my tag with a handwritten home using the Spectrum Noir gold pen.


Thank you for stopping by and I hope you have a wonderful weekend!

Topflight Stamps Supplies


Thursday, February 8, 2024

Art and Creativity

    Hi Everyone,

Cornelia here toady. This week's theme is anything goes. 
This wonderful background stamp is from AALL&Create.
I just stamped it onto water color paper and colored it with water brush pens in rainbow colors. Spritzed some water on it to have the colors blend a bit. Used a scalloped die to cut it out and mounted it onto black card stock. Added sticker sentiments. 
I hope you liked this. Thanks for visiting. 
See you next week with more Topflight Stamps inspiration.

And here are the stamp supplies I used: 

Wednesday, February 7, 2024

Let's Roll!

Hello Crafty Friends, Mary Key here! This week is "anything goes", very simple card to make. I am going to use AALL & Create and its only one large stamp and the sentiment along with some watercolor paper and some fussy cutting. I will be using AALL & Create - #652 Caravan.

First I stamped with versamark and then some black embossing powder and heat using my heat gun. I then fussy cut my stamped image.

I then traced my image using a white color pencil onto my black cardstock, so I can fussy cut it and left the top part connected so I can use it like a card.


Next,  I stamped another image using a light brown color and fussy cut it for the inside. I like to use it
like a watermark in the inside so I can write on top of my stamped image.


Now, I started to watercolor my stamped image using brush markers and used white embossing powder for the sentiment onto black cardstock. Here is my finished card.


Thank you for stopping by and keep creating!

Topflight Stamps Supplies Used:


Tuesday, February 6, 2024

A Coffee-Themed Tag Album

 It's Tuesday so you've got Kathi here to share a project with you. This week's theme is Anything Goes. I've made a coffee-themed accordion tag album with Zig Zag Journal Die Set by Studio Light, the Coffee and Chocolate Patterned 8x8 Paper Pad, and the Coffee and Chocolate Backgrounds 8x8 Paper Pad by Stamperia. The stamps used are AM Dee Clear Stamp Set #737,  Barista Dee Clear Stamp Set #760Coffee Time Clear Stamp Set #417Coffee First Clear Stamp Set #252Morning Clear Stamp Set #253, and Safety First Clear Stamp Set #254 –– all by AALL and Create. Some sentiments on the album are from the Sharp Tongues White Ephemera Die Cuts by Autour de Mwa for AALL and Create.

Here's a photo of the album folded up with a belly band.


Here's the folded album without the belly band.


Front of the album


Back of the album


Close-up of two of the pages 


Close-up of two of the pages 


Close-up of the first page of the back of the album


Close-up of two of the pages 


Close-up of two of the pages 


The Zig Zag Journal Die Set by Studio Light makes it easy and fun to make a tag accordion album that measures 2 5/16" x 4 9/16" when done. Dies range from the basic album die to a variety of fun trims, banners, tag toppers, and borders. 

Stamperia's Coffee and Chocolate Patterned 8x8 Paper Pad and the Coffee and Chocolate Backgrounds 8x8 Paper Pad are filled with wonderful coffee and chocolate imagery that can be used with all of your favorite coffee-themed stamps, stencils, and ephemera.

Please pop over to my blog, Kat's Tales of Stamping, to find step-by-step instructions and complete supply lists.
 
Topflight Stamps Products Used:


Thanks for visiting today!

Monday, February 5, 2024

Dramatic Backgrounds with Lavinia

 Hello friends. Alanna back on the Topflight Stamps blog with you today. I will be posting on the blog every Monday from now on so I hope you will join me those days. For today's cards, I created a dramatic background for my Lavinia silhouette images. 

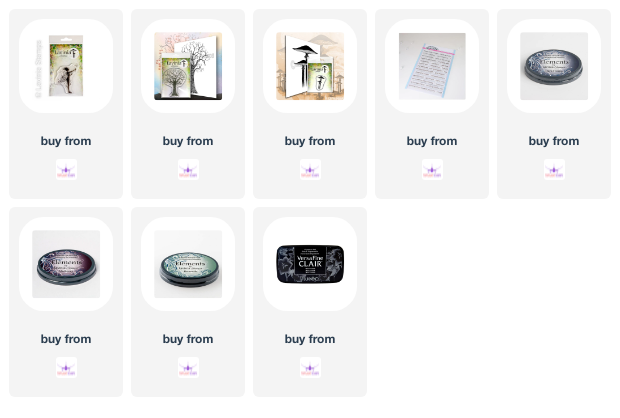
To get started, I stamped both the Tree of Dreams and the Olivia (Small) images with Versafine Claire Nocturne ink onto white card stock using my Misti. I left the stamps in the tool as I knew I was going to restamp them later.

I then took three colors of the Elements inks from Lavinia. These were my first time using them and man oh man, are they gorgeous and blend on the cardstock so nicely! I used Bermuda, Dark Denim, and Mulberry

After my background was blended in, I stamped the two images again. I stamped the tree one more time and the fairy two more times, just to add a bit of difference between the intensities of the blacks.

I then stamped my sentiments which are from the More Classic Sentiments set from Heffy Doodle. This set has so many fantastic and basic sentiments, perfect for anyone's crafty stash.

At this point, I thought I would be done but then decided that the scene needed just a bit more. So, I pulled out the Mini Meadow Mushroom stamp and stamped it three times by my tree. I think this finishes off the card perfectly. 

I hope you've been inspired by my projects today. Crafty hugs! ~ Alanna

Find all the products I used below in the Topflight Stamps store.

Friday, February 2, 2024

Darkroom Door Celebrate Card


Hello friends! Ericka from Strangely Creative here and today I am playing with some Darkroom Door to create a mixed media celebrate card. I had so much fun creating this card with a variety of layers. I first started with the Darkroom Door Circles stencil with Distress Oxide Ink in Blueprint Sketch and Lucy Clover. 

 I then stamped the Darkroom Door Number Medley with Versafine Clair Nocturn ink. I then used some shimmer spray around my card and added the Darkroom Door Diamonds stencil with texture paste.


Once my card was dry, I added the Darkroom Door Sentiment Strip from the Happy Birthday stamp.


I completed my card with a quick frame around the sentiment. Thank you for stopping by and I hope you have a wonderful weekend. 


Topflight Stamp Supplies


Thursday, February 1, 2024

Washi Tape Card

   Hi Everyone,

Cornelia  here today. This week's theme is anything goes. 
I discovered this awesome Washi tape in the store. It is from AALL&Create and you can piece it together to create a picture, or use it as you normally would.

It is called Blooming Splodge (kind of an ugly name for a really pretty tape...). I pieced it together and then used a stitched die to cut out a rectangle. Used the Katzelkraft Gears set for a background. Added some splatters.I used a ribbon from my stash. Mounted the flower panel with foam tape.
.
I hope you liked this. Thanks for visiting. 
See you next week with more Topflight Stamps inspiration.

And here are the stamp supplies I used: 
01 09 10