Showing posts with label Paperartsy fresco acrrylics. Show all posts

Friday, March 7, 2025

Spring Gel Press Card: Sunlit Fronds & Mixed Media Magic


Hello crafty friends! Ericka from Strangely Creative here, and today I’m diving into some Gel Press printing fun as spring starts to bloom! There’s something so magical about layering colors on the Gel Press plate, and this print reminded me of sunlight filtering through a forest—a perfect match for the Tracy Evans Fronds Stencil.


I started with a vibrant gel print background, letting the colors blend and create natural textures. To add even more depth, I used a small paintbrush and PaperArtsy Fresco Paint in Twilight to stencil in the delicate fronds. My first frond was a bit heavy-handed with the paint (oops!), but I adjusted on the second one, using a lighter touch to bring out the fine details.


Once the fronds dried, I stamped the sentiment from the Tracy Evans Garden Delight stencil using Versafine Clair Twilight ink for a crisp, bold statement. To tie everything together, I hand-traced a simple frame around the card, giving it that extra polished touch.

I love how this piece came together—a perfect mix of layered textures and organic beauty. It’s a great reminder that Gel Press prints are so versatile and can be the perfect base for any creative project!

✨ What’s your favorite way to use your Gel Press prints? Let me know in the comments! Thanks for stopping by, and I hope you have a wonderful, creative weekend! 


Topflight Stamp Supplies

Tracy Evans - Garden Delight
Shop at:
TP
Tracy Evans Boutique - Fronds
Shop at:
TP
Tsukineko - Versafine Clair - Twilight
Shop at:
TP
PaperArtsy - Fresco Chalk Paint - Twilight
Shop at:
TP
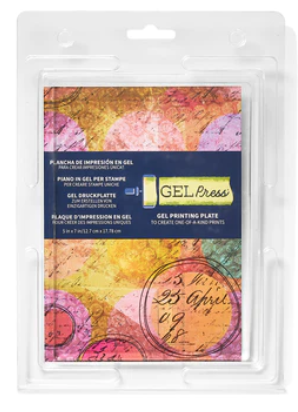
Gel Press - Reusable Gel Printing Plate
Shop at:
 TP 
Speedball - 2
Speedball - 2" Brayer
Shop at:
TP

Friday, February 9, 2024

AALL & Create Gel Press Tag


Hello friends! Ericka from Strangely Creative here and today I have a fun tag I made using my gel press along with the AALL & Create Rainbow Lane stencil along with the Die Set Hexalove. 

I first applied the PaperArtsy Fresco Chalk Paint in Sunshine to my gel press and pulled the print. I then applied  the Fresco Paint in Flamingo, Bermuda, and Parakeet and placed the stencil down and pulled the print.


I added a little shading with the Lavinia Elements Ink in Dark Denim with the Stencil Brush. I used the Die Set Hexalove with black card stock and also used a label and heart included in the set. I finished my tag with a handwritten home using the Spectrum Noir gold pen.


Thank you for stopping by and I hope you have a wonderful weekend!

Topflight Stamps Supplies


Friday, February 19, 2021

PaperArtsy Leaf

Happy Friday! Ericka here and I can't believe that we made it through the week. What a week it was too if you happen to be located in Texas or any of the other states that have been hit hard with snow and the cold weather. Being in Texas, I can tell you our houses are not built for this and boy does it get cold without electricity. But we are surviving and if you are reading this, it means I still have electricity which is a blessing. 

Today I had a chance to play with the PaperArtsy and the Sara Naumann 41 set.


I love playing with this beautiful set and the leaves with the script are so pretty.


I used the following PaperArtsy Fresco Paints: Caramel, Gold Rush, Pistachio, and South Pacific. I also colored the stamps with my Prism Brush markers in Blue Lagoon and lightly misted them for a watercolor look.


 For more information on how I created my card, stop by my blog Strangely Creative.

Thanks for stopping by and I hope you have a safe and warm weekend! Plus don’t forget to check out the sale! 


Monday, August 17, 2020

PaperArtsy Products on Mixed Media Monday!

Hello Topflight Stamp fans, Karen Bearse here playing with all things PaperArtsy. I have a full tutorial on my blog so you can see step by step how these pages are made. Check back often as the team plays with these fabulous products this week!

 I like prepping my journal pages ahead of time. That gives me some color & images to add interest making journaling more fun. 

Let's start with Fresco Finish Paint. Love this quick dry matt finish paint. You can write on it as soon as it is dry. I love this stencil too, small but great image. 

 Infusions Powders make great backgrounds. Just sprinkle & add water for vibrant color.

PaperArtsy stamps by Seth Apter ESA15, ESA13

More stamps by Seth love these mini's EM50, EM37, 

The images in this set are wonderful, by Tracy Scott. So much potential.  ETS 39 .

This stencil though love the circles. Great to overlap with different paints. PS145


 Have you tried adding Zinis to your projects, They are so cute!

 Love these little Zini's, such a fun way to jazz up your planner or journal pages. Thanks so much for joining me today. I hope you get the chance to get inky today!!

Monday, August 10, 2020

AALL & Create Tracy Evans Hare Tissue Stamping Technique


Happy Monday!  It's Autumn Clark from SewPaperPaint with you today to share a fun mixed media technique turned encouragement card.  I am absolutely in love with Tracy Evans' new Hare stamp!  I really wanted to use him repeatedly on the same project and the more I thought about it, the more I decided I wanted to use the tissue paper stamping technique so I could point him in different directions.

I simply stamped three rabbits onto tissue paper (the kind for gift wrap) in permanent black ink over a piece of scrap paper (to absorb any excess ink).  I dried with my heat tool.  Then I painted two images on reverse side with PaperArtsy Fresco Finish Chalk Acrylics over my glass mat (because the tissue would stick to paper) and the third image on the front side.  The colors I used were Caramel, Nougat, Slate and Blush.  Once the painted images were dried, I outlined them with water on a brush so I could tear away the excess tissue paper.  Then I used ModPodge to adhere them to a gel printed panel.  This close up details shows how well the tissue "melts" into the background.  It is a great way to layer images without masking.  Finally, I added some gold embossing with the Roundly stamp and watery drips of more Blush Frescos.  The sentiment is a sticker.

I hope this post has given you some fresh ideas and made you want to play!  Visit Topflight Stamps today to see all of the new AALL & Create stamps!  Hugs, Autumn

Monday, March 9, 2020

PaperArtsy Gwen LaFleur Bird Journal and Card


Hi everyone!  It's Autumn Clark from SewPaperPaint with you today to kick off our week of Mother's Day crafting inspiration.  I wanted to create a card and notebook gift set, so I altered an Eileen Hull Wrap Journal Die with PaperArtsy Fresco Finish Chalk Acrylic Paints and the new stamp set by Gwen LaFleur, EGL05.  First I thought I would make some two sided painted paper to use for my handmade insert covers.  


I used a palette of Nougat, Taupe, Sage, Hint of Mint, Blush and Autumn Fire toned down with Blush and painted at random on a sheet of PaperArtsy Smoothy cardstock.  I then used my leftover paint to sponge Tracy Scott's new Mini Stamps EM64, EM61 and EM60.


On the back side of the cardstock, I used my leftover paints mixed with water to make a lighter wash of the same colors and used coordinating inks to stamp with.


Once I was satisfied with how my palette worked together, I painted the front of my die cut journal in similar fashion, omitting the stamped dots.


Once I dried my journal completely, I was able to line it up in my stamp platform and do repeat stamping.  The purpose of this was to stamp one impression to leave me a guide to paint with.  I painted the sections as shown above, then when my paint was dried I stamped the image again to bring back the line detail.  Note I even used a scrap bag for my palette so it would be handy to work inside of my stamp platform and I could throw it right away when I was finished.


Here is the finished detail.  This process achieves two things: 1. the finished image is smooth (it was important for me to have a nice feel to the cover of my journal) and 2.  it eliminates fussy cutting.  3.  bonus - its just such a cool way to use your tools!


Here is my finished journal.  I glued the leftover strip from making my notebook inserts to the flap side for contrast.


The magnolia wraps around to the back of the journal...


I am absolutely crazy over this stamp set!  There are so many new releases in the PaperArtsy section of TopflightStamps.com.  And here is a shot of the inserts I made with my long reach stapler and kraft paper.  


It was really hard to capture the soft colors on this journal, but I'm sharing a video on Instagram @sewpaperpaint.


Next, I made a super easy background to coordinate.  My favorite ways to use Prism Ink Pads is direct to paper.  I looked at the color chard I made and picked colors that blended with my journal.  Find the color chart HERE.  I just swiped the pads across PaperArtsy Smoothy cardstock.  I stamped Mini Stamp EM64 with Fresco Chalk Acrylics in Nougat using a sponge.  


I watercolored the focal images for my card with Distress Inks.


I used some basic dies and Gumdrops to finish the card.  My second bird found his home on the inside cover of my journal, which I lined with patterned paper to coordinate.


I hope you're inspired to make a gift set of your own today!  It has been a pleasure to share with you.  Hugs, Autumn

Facebook: Autumn Clark
Instagram: @sewpaperpaint
Pinterest: Autumn S Clark


01 09 10