Showing posts with label Neenah. Show all posts

Tuesday, December 14, 2021

Have a Cracking Good Christmas!

 Greetings! It's Tuesday so you've got Kathi here to share a project with you. I'm the first to admit that my tastes are somewhat eclectic and that I really like quirky imagery, which is why I absolutely, positively had to have the new  Nicci Battilana Eclectica ENB06 Rubber Cling Mounted Stamp Set by PaperArtsy. You really must check out this stamp set because all the details are absolutely amazing from the tiny skulls on the Naughty or Nice ornament to the tiny writing on the nutcracker. 

I'm still cranking out holiday cards, so I used this set to create a slimline card!

Here it is!


The nutcracker and ornaments were stamped onto white card, fussy-cut, colored with Copic markers, then edged with a dark marker.

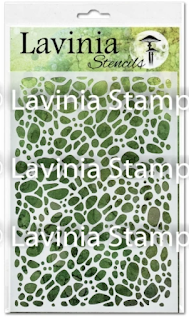
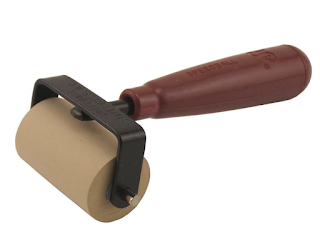
The background was created with Distress Oxide Spray. The 2" Speedball Brayer was used to brayer grey ink onto the Stones Stencil by Lavinia Stamps, which was then pressed onto the sprayed cardstock, and run through the die-cut machine several times, which added both definition and texture to the cardstock. Distress Oxide ink was then sponged through the stencil to deepen the colors of the stones. 

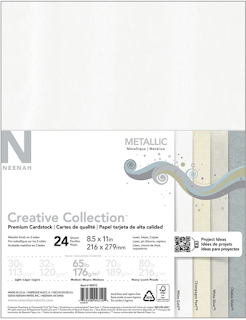
The panel was trimmed then matted with the lovely gold cardstock from the Neenah Creative Collection Premium Metallic Cardstock which was also used to die-cut the ornament hangers.

A garland was added to the top of the image panel, enhanced with lots of sparkly star sequins, and two bows. The ornaments were "hung" from the garland then the nutcracker was adhered.

Please visit my blog, Kat's Tales of Stamping, for detailed instructions and complete supply lists. 

Topflight Stamps Products Used:

Tuesday, August 17, 2021

Thank You Card!

Greetings! It's Tuesday so you've got Kathi here to share a project with you. I always need thank you cards, so here's one using Visible Image's One Kind Word and Mesh-Ellaneous Clear Polymer Stamp Sets 


Since the typewriter stamp from the One Kind Word is so detailed, I used Onyx Black VersaFine Ink by Tsukineko to stamp it onto white cardstock and onto masking paper. The sentiment and heart were stamped with VersaFine Ink, then the image was masked and a background was added with Distress ink. 

One of the mesh stamps from the Mesh-Ellaneous Clear Polymer Stamp Set by Visible Image  was stamped with Distress ink, then intentionally smudged.

Silver metallic cardstock from the packet of Neenah Creative Collection Premium Metallic Cardstock took a few rides through my Big Shot inside of an embossing folder. Both sheets of embossed silver cardstock was sprayed with Distress Oxide  ink, heat set, then sponged with blue and red Archival inks using the Premier Ink Blending Tool and Foam by Hunkydory Crafts. One piece was trimmed to become the background panel.

The "L", "O", "V", "E", and "&" typewriter keys were cut from a second sheet of embossed and inked silver metallic cardstock. They were adhered to the back of the matted image.

3D Adhesive Foam Roll by Hunkydory Crafts was used to adhere the typewriter keys and matted image to the background panel.

If you'd like to read more about this card, please pop over to my blog, Kat's Tales of Stamping!

Topflight Stamp Products Used:


Thanks for visiting today!

Tuesday, December 22, 2020

Believe in the Magic

 Greetings! It's Tuesday so it's Kathi here sharing a Christmas card! Since this is a magical time of year, I decided to use the beautiful focal fairy stamp from the Make a Wish Clear Polymer Stamp Set by Pink Ink Designs to create a card. I also used just the first line from the Sacred Spells verse by Lavinia Stamps, though the Fairy Merry Christmas Clear Polymer Stamp would have worked nice too, if I only had it in my stash! 

Here's my card!


The fairy from the Make a Wish Clear Polymer Stamp Set was stamped onto white cardstock and colored with Copic markers. Glitter pens were used to add a touch of glitter to the snowflakes and some of the small dots. A white gel pen was used to add highlights to the holly berries, then several layers of clear Glaze pen was used to dimension and shine to them and the mistletoe berries.

I stamped the first line the verse from the Sacred Spells Clear Polymer Stamp using Onyx Black VersaFine Ink below the image on the colored background. 

Fairy Merry Christmas Clear Polymer Stamp, also by Lavinia Stamps would have worked really well. Alas, I don't have it in my stash. Yet!

Since the fairy stamp was so intricately detailed, I decided to keep the card design fairly simple, so I limited myself to using a corner rounder punch was used on the top right hand corner, a mat layer, and patterned paper.

White Gold Premium Metallic Cardstock from the Neenah Creative Collection was sponged with Rainforest Green Prism Ink by Hunkydory Crafts to create shimmery green cardstock that was used to mat the image panel. Using dye inks with this paper creates some really wonderful results, especially if you're a magpie like me and love some shimmer and glitter.

The image panel was first adhered to patterned paper, then to a 5" x 7" card.

If you'd like to learn more about my card, please visit my blog, Kat's Tales of Stamping.

Topflight Stamps Products Used:


Not used but a good alternative would have been:

Tuesday, December 15, 2020

Merry Christmas - Steampunk Style

Hi there! It's Tuesday, which means that it's Kathi here sharing a project with you. I'm still in Christmas card mode since I still have a bit of time left to get cards in the mail and have the arrive in time. 

This week I've got a card that I created using the owl from the Steampunk Darlings Accessories Set 1 Clear Stamp Set by Kelly Horton for That's Crafty with my oft-used Classic Sentiments Clear Stamp Set by Heffy Doodle.

Here it is!


This was a relatively quick and easy card to make. Using Memento ink, I stamped the owl from the Steampunk Darlings Accessories Set two times. Both owls were fussy-cut,  colored with Copic markers, and edged with a black marker.

Gold Cardstock from the Neenah Creative Collection Premium Metallic Cardstock Pack was cut with a Steampunk Wreath Frame. White cardstock was cut with the bow die from the same die set and a banner from a different die set. Both white dies were colored with Copic markers.

The sentiment from the Classic Sentiments Clear Stamp Set was stamped using 
Onyx Black VersaFine Ink by Tsukineko onto the red-colored banner die-cut.

The fussy-cut owls were adhered to the gold wreath, then the wreath and the ribbon were adhered to Christmas/Steampunk patterned paper using dimensional foam adhesive.

The patterned paper card front was adhered to a green A2 card. The sentiment was adhered using dimensional foam adhesive to finish the card. 

If you'd like to learn more about this card, please visit my blog, Kat's Tales of Stamping. 

Topflight Stamps Products Used:

BTW, there are some wonderful new products at Topflight Stamps, so you should pop over to check them out. If you'd like a 12% discount on your purchase, please use THIS LINK!


Thanks for visiting today!

Tuesday, December 1, 2020

Steampunk Alchemist Canvas

Greetings. It's Tuesday, so it's Kathi here to share a project with you. Since I love Steampunk, when I saw AALL and Create's new Steampunk Alchemist Clear Stamp Set #387 by Olga Heldwein, I knew I had to have it and I knew that one of the first projects I'd create with it would be a mixed media canvas.

Here it is!


I started the project by spreading sand texture paste over an 8x10 canvas so the canvas texture would be disappear. 

While the paste was drying, I stamped the Steampunk Alchemist, the bottles and can, and the three lights from the Steampunk Alchemist Clear Stamp Set #387 and fussy-cut them.

By the time I was done fussy-cutting, the paste was dry, but I blasted it with my heat gun to make sure it was dry so I could paint the background.

Stone Fresco Chalk Paint was mixed with grey and black Fresco paints and painted onto the canvas. The same paints were mixed into the remaining Sand Paste in the jar so I could spread it over the Distressed Brick 6x6 Stencil by Paper Rose. Alas, I diluted it a little too much, so I just smooshed the sand paste onto the canvas to create a textured background.

I blasted the piece with my heat gun to dry it, which caused some bubbling, which just added to the texture. I had left the lid off of the sand paste and was delighted to see that it had thickened enough to apply over the Distressed Brick 6x6 Stencil. This time it worked-ish -- or at least enough to create a subtle brick pattern on the canvas.

I allowed the stenciled bricks to air dry while I used my Copic markers to color all of the elements that I had fussy-cut earlier. When I was done coloring them, they were all edged with a dark marker so that there would be no unslightly white edges.

The table and the diagram from the Steampunk Alchemist Clear Stamp Set #387 were stamped with Onyx Black VersaFine Ink because they were so very detailed and I wasn't planning to color them. 

Brown paper was die-cut to create the shelf for the pharmaceuticals and frames for the table and diagram. Silver metallic cardstock from the Neenah Creative Collection was die-cut with two different chain dies.

At this point the canvas was mostly dry, so I blasted it with my heat gun, edged the canvas with black Fresco Chalk paint, and dry-brushed the black paint over the canvas to bring out some of the details of the brick and such.

Wood patterned paper was adhered to chipboard, which was layered onto the base of the canvas. Washi tape was adhered to the bottom of the canvas and the "Steampunk" and pointing hand from the Steampunk Mixed Media Transfers were applied.

All the elements of the scene were adhered using tape runner, double-sided tape, and foam adhesives.

If you'd like to learn more about my canvas, please pop over to my blog, Kat's Tales of Stamping.

Topflight Stamps Products Used:


Silver Metallic Cardstock from the Neenah Creative Collection


Thanks for visiting today! See you next week!

Friday, October 2, 2020

It's Time to Celebrate!

 It's Friday, not Tuesday, and it's Kathi here, with a card with you. This week my teammates and I are sharing projects created with the wonderful products by That's Crafty! 

It's fairly well known that I love all things Steampunk, ranging from Steampunk fiction to the Steampunk aesthetic. So, when That's Crafty released several Steampunk-themed clear stamp sets designed by Kelly Horton, I had to have most of them, especially since several of the stamp sets also had skulls, cats, and owls, which are a few of my favorite things!

Here's my card using two of the gorgeous ladies from That's Crafty's Steampunk Darlings, Set 1, one of the cats from the Steampunk Darlings Accessories Set 2, and a sentiment from Darkroom Door's Celebrate Sentiment Strip Red Rubber Cling Stamp. 


Two of the gorgeous ladies from That's Crafty's 
Steampunk Darlings, Set 1  and one of the cats from the Steampunk Darlings Accessories Set 2 were stamped with Memento ink, fussy-cut, colored with Copic markers, then edged with a black pen. A Clear Stardust Glitter Gel pen was used to add a touch of bling to the hair jewelry on the owl girl. When the gel ink was dry, several layers of Clear Glaze Gel pen were applied to add glossy dimension and shine to them. Gold Stardust Glitter Gel pen was used to add sparkle to the buckles and the center of the cat's medallion.

I found some wonderful Industrial-themed patterned paper by Studio Light in my stash and chose the brick and pipes paper to use as a background. I used some grey Copic markers to add some detail and shadows to the brick. I also trimmed a piece of rusty rivets from another patterned paper pad to use to ground the images.

Truth be told, I could have used the new 6x6 Brick Wall Stencil by That's Crafty  and then used Pipe dies or chipboard (both in my stash). Alternately, I could have applied texture paste, such as Cosmic Shimmer's Lava Paste through the Mechanical Seaworld Pipes Stencil by Stamperia onto the brick stenciled background.  I did contemplate this option, but decided I would use those techniques another time. 

Cutting dies were used to cut white cardstock for the light and the gear behind the clock. The die-cuts were colored with Copic markers. The rub-on clock from a super-old sheet was applied to a die-cut circle that had been colored with a Copic marker. The circle was then added to the gear die. 

The sentiment, from Darkroom Door's Celebrate Sentiment Strip Red Rubber Cling Stamp, was stamped onto white cardstock and die-cut with a tiny rectangle die. White cardstock was trimmed to be slightly larger. The sentiment die-cut and the backer were colored with Copic markers to coordinate with the rest of the piece. 

 A chain and a Nuts and Bolts die were used to cut Silver Metallic Cardstock from the Neenah Creative Collection Premium Metallic Cardstock set.

If you'd like to learn more about my card, please visit my blog, Kat's Tales of Stamping. 

Topflight Stamps Products Used:


Thanks for visiting today! I'll be back to my regular time next Tuesday!

Tuesday, June 30, 2020

Have a Magical Adventure!

Hi there! It's Kathi here sharing a project. This week my lovely teammates and I are sharing projects made with stencils. Topflight Stamps carries lots of wonderful stencils by a variety of companies, so you should mosey over there, have a magical adventure discovering new stencils.


Here's my project.


The Steampunkesque Cling Rubber Stamp Set has four wonderful Steampunk images and three sentiments.

I chose the flying man image, which is kind iconic. If you have a Trader Joe's supermarket near you, they used to have that image on their shopping bags. Anyway, I stamped the image onto white cardstock and onto mask paper. The mask was fussy-cut and placed over its counterpart on the image panel.

Periwinkle Prism Ink was sponged over the clouds portion of the Great Outdoors Stencil by PolkaDoodles. I start at the top and work my way downwards. I then went back and did the same thing, a bit more randomly Pink Jellybean Prism Ink. 

When I was happy with the coverage, the stencil was removed and I placed the Kay Carley PS080 Stencil by PaperArtsy stencil at the base of the image panel and sponged  Rainforest Green, Dusky Rose, Fire Coral, Purple Velvet Prism Ink by Hunkydory Crafts over it.

The mask was lifted and the image was colored with Copic markers and some glitter pens. The image panel was matted with silver cardstock, then set aside while I worked on the background for the piece. 

Moving from left to right, several colors of Distress Oxide inks were sponged over the Cogged Up Stencil onto Silver Metallic Cardstock and heat set. The piece was trimmed into three pieces and edged with more Distress Oxide Inks, adhered to black cardstock, then matted as shown.

Black Modeling Paste was scraped over the Journey Stencil onto die-cut black cardstock. The stencil was removed and silver embossing powder was sprinkled onto the wet paste. The excess powder was dumped off, and the sentiment was heat set. An embossing pen was used to add some fluid randomly to the letters, then rust embossing powder was applied, removed, then heat set. The sentiment was matted with silver cardstock, then it and the image panel were added to complete the piece.

If you're curious about this project, I will have some step-out photos and a more complete (totally boringly verbose) set of instructions on my blog, Kat's Tales of Stamping. 

Topflight Products Used:


The Cogged Up Stencil by Andy Skinner for Creative Expressions


Thanks for visiting! See you next Tuesday!

Sunday, September 1, 2019

Gel Press Mixed Media Fun!

Happy Monday! Today I have a mixed media birthday card to share with you. The base is a Gel Press Plate print from a mad cap printing session I did a while ago. Monoprinting with a Gel Press is highly addictive, let me warn you! It's a great way to play and then you have a stack of prints at the ready for using to make cards, journals and other art endeavors.


In this case, I trimmed my print to fit the front of the card (made with Neenah Metallic Cardstock) and used a stamp platform to stamp the Polkadoodles Queen of Hearts Collage stamp onto it. The print wasn't perfectly smooth so I had to re-ink the stamp and stamp again to get a few spots that got missed the first time. Thanks goodness for stamping platforms!

I stamped a small tag with the Happy Birthday Sentiment from Darkroom Door and some of the flowers from the Polkadoodles set. I sent this off to my aunt for her birthday and I hope she likes it. (These are some of her favorite colors and she loves to garden.)

Thanks for stopping by!

Topflight Stamps Products:


Darkroom Door stamp set - Happy Birthday Sentiment Stamps


Prism Ink - Thundercloud, Camellia Pink


01 09 10