

Hi friends! It's Autumn Clark from SewPaperPaint with you today to share some fun projects with Lavinia Stencils and Stamps. This is a really simple process that creates beautiful, interesting backgrounds with ease. I've got three samples for you so you can really understand the process. First, you dip a panel in two or three colors of Lavinia Elements Dye Inks, having spritzed them with water after tapping onto your kraft mat. First you can see I dipped the top of my first panel in Mermaid. I dipped the bottom part in Violet Chalk. I always suggest using a spray bottle to spritz the panel and let it blend, or to use the excess water to dab up some "too heavy" color. Once the panel is dry, you simply layer a stencil and sponge with the coordinating color. You can see I sponged through the Lavinia Crackle stencil in Violet Chalk over the purple background and in Mermaid over the teal background.

For my next card, I repeated the same process. I dipped the top of my panel in Sundance Elements ink and the bottom in Russet Orange. Then I sponged through the same Crackle stencil color over color.

I finished both cards by stamping the GORGEOUS Star Burst stamp twice, then stamping the Wild Vines going down and the Whimsical Whisps (small) going up. Both in the colors of each respective background. I added details with an array of Posca paint markers.

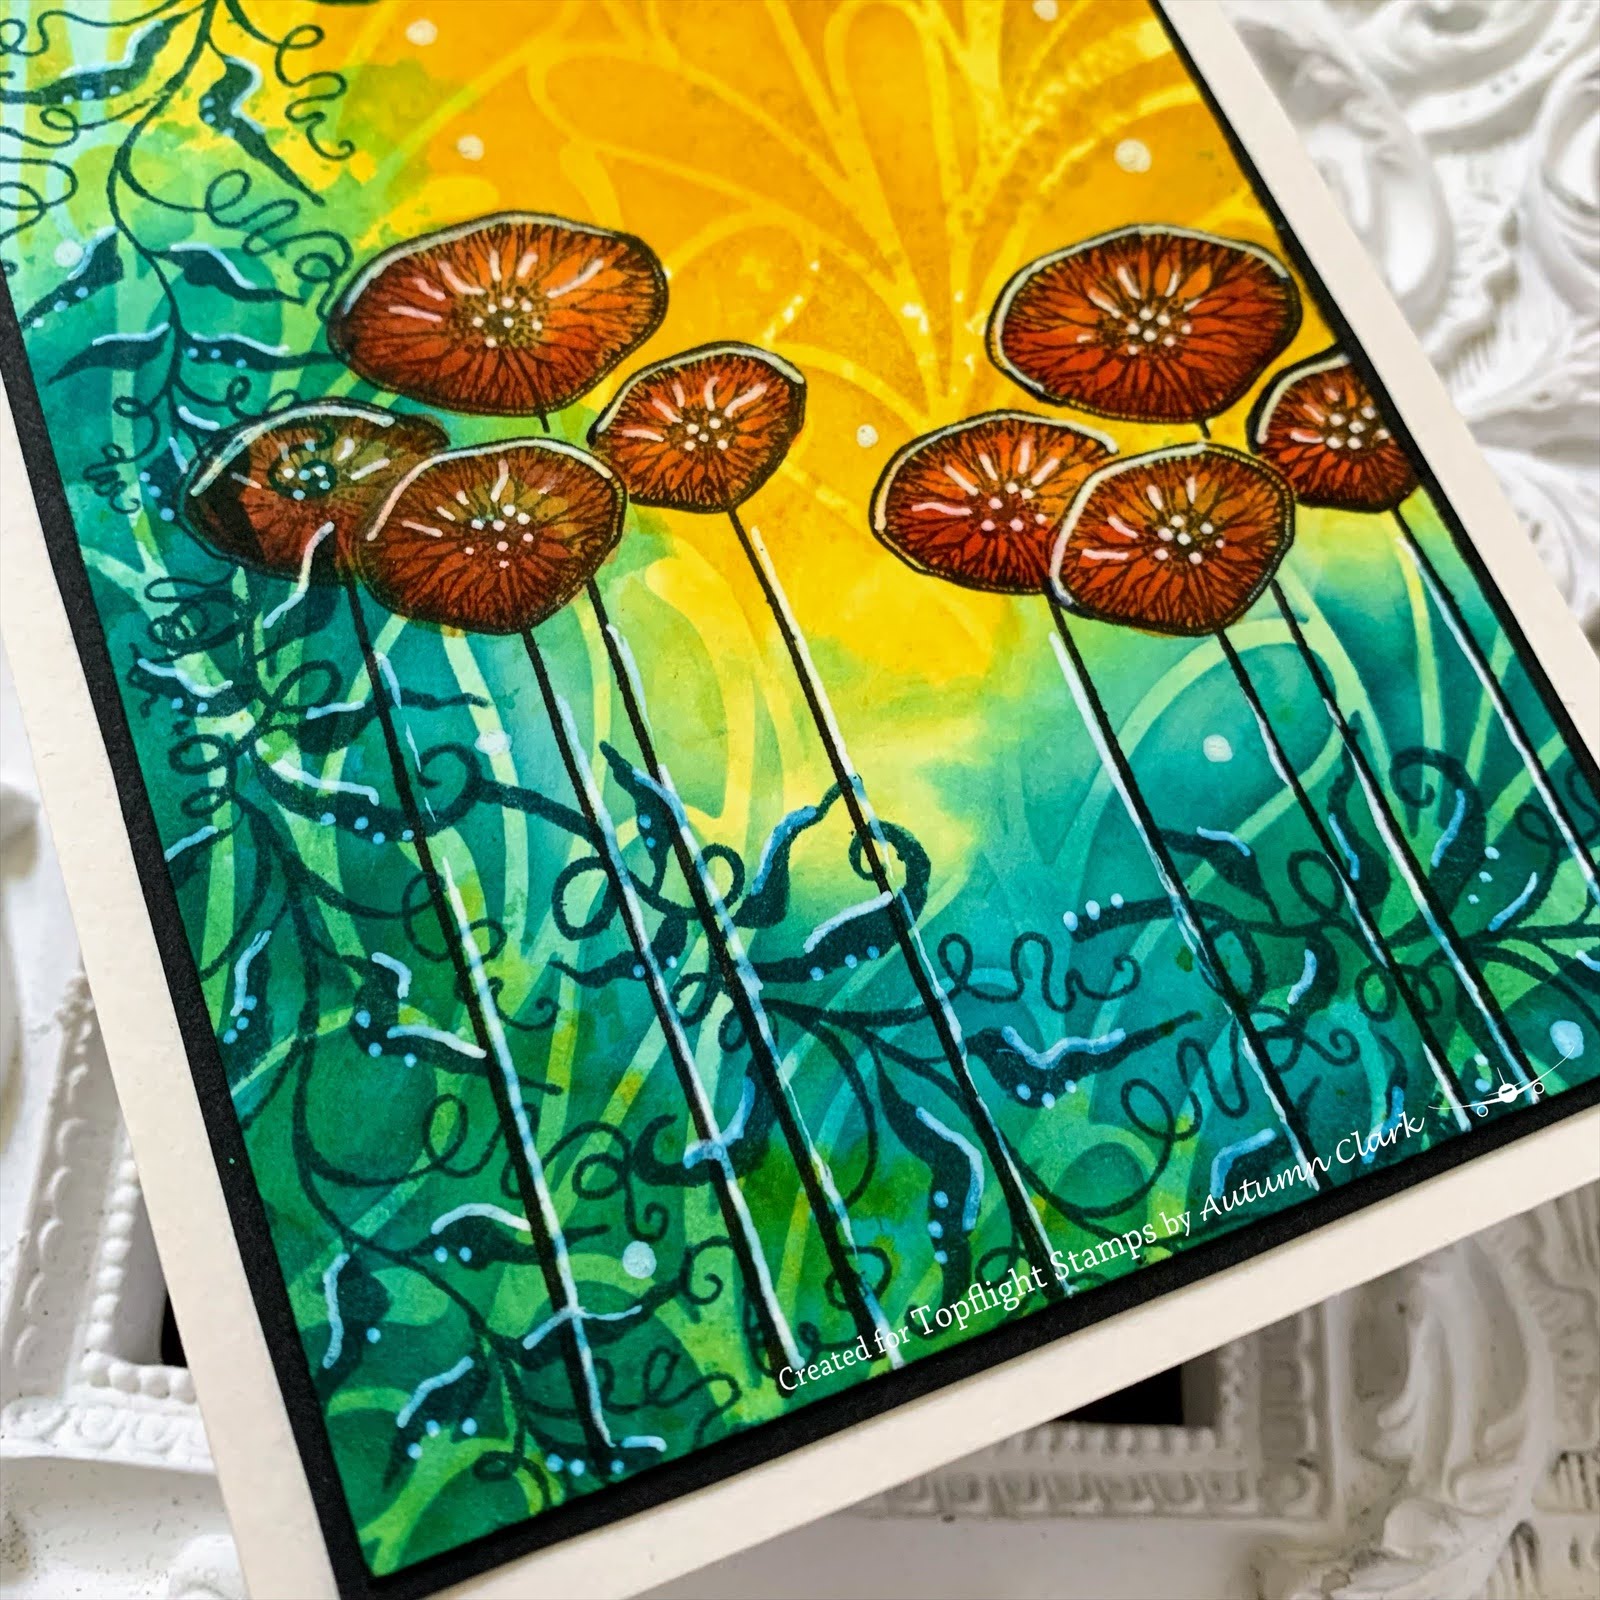
I did one more card and mixed it up a little. This time, I dipped the top of my panel in Sahara and the bottom in Mermaid. I sponged in the coordinating inks through the Flora Lavinia stencil.

I stamped the Lunar Buds stamp twice and colored the pods in with Paprika. I filled the bottom with Wild Vines stamped in Mermaid. I added a little bit of highlight with a white Posca marker. I really hope you'll try this layered stencil technique. It's such fun and the color possibilities are endless. Hugs, Autumn
Visit Topflight Stamps today for all your stamping needs!


No comments:
Post a Comment