Tuesday, June 22, 2021

Stamperia Wild Cat

Greetings! It's Tuesday so you've got Kathi here to share a project with you. This week my teammates and I are showcasing Stamperia's wonderful products.

Here's my card using the Jaguar stamp from the Amazonia Jaguar Foam Mounted Stamp Set with the sentiment from the Lady Vagabond Flying A5 Foam Mounted Stamp Set.


I started the card by stamping the Jaguar onto white cardstock and coloring the image and his background with Copic markers. The image panel was die-cut and set aside while I created the background.

I watched Autumn's Prism Ink/Gel Press Ombré Video on Instagram and decided to give it a go. Being me, I didn't really follow her video except for the way that I applied the ink. I dabbed the Apple GreenSpring Meadow, and Rainforest Green Prism Inks onto a 5" x 7" Gel Press, blended the inks horizontally with a wide brayer, and pulled a print onto mixed media cardstock. I didn't get a proper Ombré effect, but I covered the paper with variegated greens which made me happy. I spritzed the cardstock with water, let the ink drip and blend a bit, then heat set the background til dry.

Apple Green was brushed over the Elegance Stencil by Lavinia Stamps using the largest brush from the Black Blending Brush Set, then heat set again.

The background panel was trimmed and edged with Rainforest Green Prism Ink. The sentiment from the Lady Vagabond Flying A5 Foam Mounted Stamp Set  was stamped with Morning Mist VersaFine Clair ink. I colored the gears with india ink pens and added some silver glitter pen accents to the sentiment.

The image panel die-cut was trimmed and adhered to the top of the background panel. Greyish/silvery metallic cardstock was used to mat the image panel which was adhered to a 5" x 7" green card.

If you'd like to learn more about this card, please visit my blog, Kat's Tales of Stamping. 

Topflight Stamps Products Used:


Thanks for visiting today!

Monday, June 21, 2021

Let's Make an Art Card!

 Hello Topflight Stamps, Karen Bearse here with an art card that can be used in a small journal, for a card or as a pocket in a mixed media art journal. As always there is a full tutorial on my blog.

Here is my card, this week the team are playing with Stamperia & those were the stamps used for my focal images. 

This set Cosmos Feather has wonderfully detailed images. The bonus is the image is on the back of the stamp for easy placement. Love that feather! 

The background was created using this Rounded Rectangles stencil & also...

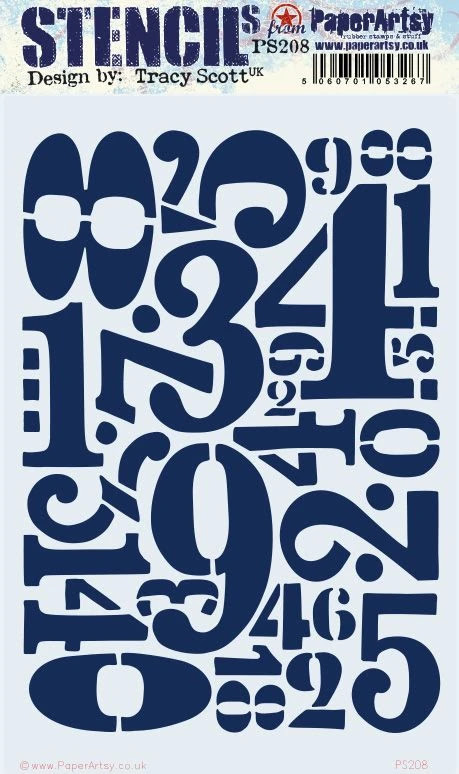
This fabulous numbers set PS208, one of my favorites & should be used over & over!


 Of course we need color, my usual go to products are Fresco Finish paint, for one. It dries with a matte finish & can be written on with any type of pen once dry which is a unique trait. 

For stamping I love the coverage of Prism Inks. I need to add to my collection!

I also really like this glue for adhering heavier pieces like card stock stamped images. Cosmic Shimmer Quick Grab. For a compete list of supplies please head over to my blog & see how this card was made! That's it for this week, I hope you get the chance to get inky!!

Sunday, June 20, 2021

Summer Blog Hop Winner


Thank you to everyone who left comments on the blogs and played along. Thank you also to al the designers and your beautiful summer creations!

The winner of the $50 gift card is . . . Graciella. Congratulations!! 

Please email strangelycreativecards@gmail.com with the subject line "Topflight Stamps Summer Blog Hop Winner" and I will get you you gift card. Thank you everyone for playing along.

Moon Fairy for the Summer Solstice!

Greetings! It's Kathi here to share a card created to celebrate the Summer Soltice using the Serenity Stardust Clear Polymer Stamp by Polkadoodles with AALL and Create's Reverse Stars Clear Stamp Set #485 and Scripted Stars Clear Stamp Set #458.

Here it is!


The first step was to stamp Serenity Stardust with Memento ink onto white cardstock. The image and background were colored with Copic markers. The image panel was cut with an oval die, matted onto an oval cut with a matching stitched oval die that was edged with sparkly gold ink, and set aside

Sparkly gold ink was used to stamp around the edges of a 4.75" x 6.75" piece of blue cardstock. The ink was heat set which brings out the sparkle even more. This piece was secured to a stamping platform and the Scripted Stars Clear Stamp Set #458 was stamped with white ink. The background panel was moved to be flush with the 3.25"(ish) mark, the stamp was re-inked, and the panel was stamped again. The background white and gold inks were heat set. The background panel was edged with the gold ink, then heat set again to bring out the sparkle.

The background panel was adhered to a blue 5" x 7" card and the matted image panel was adhered to finish it all up.

If you'd like to learn more about the card, please visit my blog Kat's Tales of Stamping.


Topflight Stamps Products Used:


Thanks for visiting!

Saturday, June 19, 2021

Darkroom Door Ombre Gel Printed Ink Tutorial


Happy Saturday friends!  It's Autumn Clark from SewPaperPaint with you today to share a fun and simple background making technique using the Gel Press printing plate and Prism Dye Ink Pads.  I finished one of my ombre backgrounds by adding a flower stamp by Darkroom Door, and embellishing the background with the Abstract 06 stamp, Arty Circles and the Friendship Sentiment Strip, with a little washi tape for interest.


You can see just how many amazing color combinations you can create with this technique.  Prism Dye Ink Pads are thicker than most dye inks, almost with the consistency of pigment ink, so they work perfectly on the gel plate.  You could definitely play with some stencils over the inks on your plate to create new variations.


Here is a quick video showing the process.  The trick is to do two identical prints of the same ombred ink, creating vibrant, intense colors.  To make the light dots, you simply splash a little water on the finished print and lift it with a cloth.  I hope you will enjoy playing around with this fun technique.  Hugs, Autumn


Friday, June 18, 2021

AALL & Create Thistle by Tracy Evans


Hello friends! Ericka from Strangely Creative here and today I'm playing with the AALL & Create Thistle stamp from Tracy Evans. I love this beautiful stamp and I'm always partial to images with script in the background. I love this set so much that I created a slimline card along with a bookmark.

I used Distress Oxides and the Time for Tea blending brushes to blend the color onto my paper. I then stamped the thistle using Lavinia Elements Ink in Merlot and used the Pine ink to color in the stem.

I created my bookmark the same way except this time I used Kraft cardstock and added Mulberry ink for the thistle portion of the stamp.

I added some ribbon in my stash to finish my bookmark. Thanks for stopping by and I hope you have a wonderful weekend with some time to create.  


Topflight Stamp Supplies Used: 


Thursday, June 17, 2021

AALL&Create - Merry and Bright

     Hi Everyone,

Cornelia here today! 
This week it's anything goes at Topflight Stamps.
I have not yet really started on my Christmas cards - shame on me....it's about time to get things going....


AALL&Create has this adorable set. It begged me to ink it up, LOL! It really is perfect for those quick cards, but the images are so cute, you really don't need much. I used an embossing folder for my background and did a bit of sponging. I colored with Copics. Added white gel pen accents.  I cut out the image, mounted it with foam tape and added the sentiment.


I hope you liked this. Thanks for visiting. 
See you next week with more Topflight Stamps inspiration.


Here are the stamp supplies I used:
Use code FUNSTAMPING to get 12% discount at Topflight Stamps


01 09 10