It's Tuesday which means that you've got Kathi here to share a project with you. This week my teammates and I are showcasing wonderful products by Chou and Flowers.
Here's my card made with the Pickup Truck Clear Stamp Set and the Foliage Border Stencil.
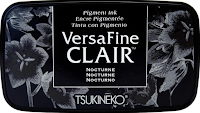
Use Nocturne VersaFine Clair Ink by Imagine Craft to stamp the scene onto Bristol paper and heat set. Color the truck, windmill, planter, and the sack of eggs with watercolor pencils. Use silver watercolor to add a metallic touch to the windmill's vanes, the truck's bumpers, mirrors, and one of the pails.
Using a ruler and a dark brown watercolor pencil, draw a line to ground the scene's elements, then use the pencils to add a sand/dirt foreground.
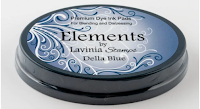
Place one of the mountain mask from the Acetate Hills Masks/Stencils by Lavinia Stamps horizontally across the top part of the image. Brush or sponge Della Blue Elements Ink by Lavinia Stamps over the top of the mask to create a blue sky.
Leaving the stencil in place, trace it with a dark green watercolor pencil.
Place the rolling hills mask from the Acetate Hills Masks/Stencils by Lavinia Stamps horizontally below the mountains and trace it with a dark green watercolor pencil. Move the mask downwards and a bit to the side and trace the top of the mask again.
Use several green watercolor pencils to color in the mountains, hills, and valleys. Trim the image panel to 3" x 4.25" and edge it with Della Blue Elements Ink.
Using a stamping platform and Nocturne VersaFine Clair Ink stamp the sentiments onto the image panel. Heat set.
Cut a piece of white cardstock to 3.25" x 4.5". Use the Silver Ingot Metallic Marker from the Essential Metallics Colorista Marker Set by Spectrum Noir to add a .25" silver border all around the white cardstock. Heat set. Use the Burnished Copper Metallic Marker from the Essential Metallics Colorista Marker Set by Spectrum Noir to edge the panel. While the copper ink is still wet, use your finger to smear it over the silver background. Heat set, then use this panel to mat the image panel.
Trim a piece of white cardstock to 4" x 5.25" to create a patterned background panel. Use a Lavinia Blender to apply Acorn VersaFine Clair Inks over the panel. Heat set.
Position the Foliage Border Stencil by Chou and Flowers along onto one side of the image panel with the foliage facing the center of the panel. Use a Lavinia Blender to sponge Pinecone VersaFine Clair Ink over the stencil onto the side of the paper. Repeat this process three times to create a stencilled background panel. Remove the stencil, edge the panel with Sponge Pinecone VersaFine Clair Ink, and heat set.
Adhere the background panel to a dark brown A2 card. Adhere the image panel to complete the card.
Please pop over to my blog, Kat's Tales of Stamping, for instructions and complete supply lists.
Topflight Stamps Products Used:
Thanks for visiting today!


No comments:
Post a Comment